Your First Project
MCP Express needs to be installed on either your local machine or your Server instance to start creating your MCP Servers. If installing on a Server with a custom Domain, we recommend using nginx as a reverse proxy to handle TLS. Refer to the Installation Guide for further details on how.
Start your MCP Express Project
Section titled “Start your MCP Express Project”- Create your Project by running the following command.
You can adjust the project name as you wish from my-express-mcp to any name you want. The CLI result should be as shown below:
Terminal window npm create @mcpexpress my-express-mcp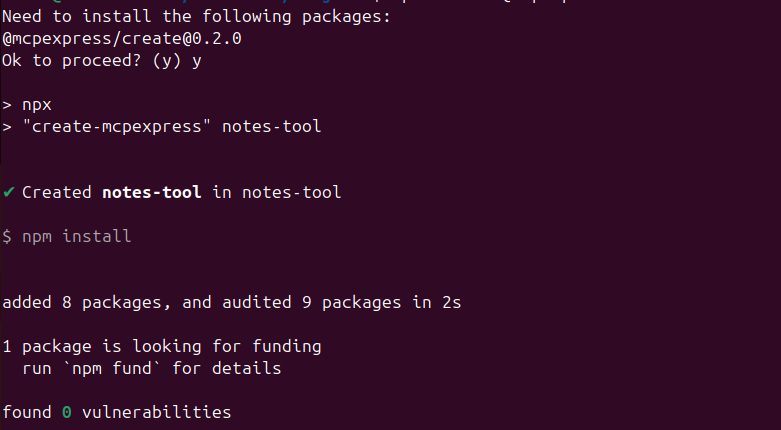
- Open your Project in an Editor. You should see the following folder structure. You can add your MCP Tools in the
src/tools/.Note:Do not forget to register the tools in thesrc/tools.ts.Directory.claude Claude Code Scaffolding
Directoryskills
- …
Directoryscripts Contains helpful scripts
- …
Directorysrc
Directorytools contains tool code
- say-hello.ts sample tool
- tools.ts all exported tools defined here
- package.json
- README.md
mcpexpress-builderskill to let your AI Agents write the MCP Code for you.
Provision and Deploy your Code
Section titled “Provision and Deploy your Code”- Launch your MCP Express Instance and navigate to the MCP Servers Page in your Installation. For local installations the page can be found under this link.
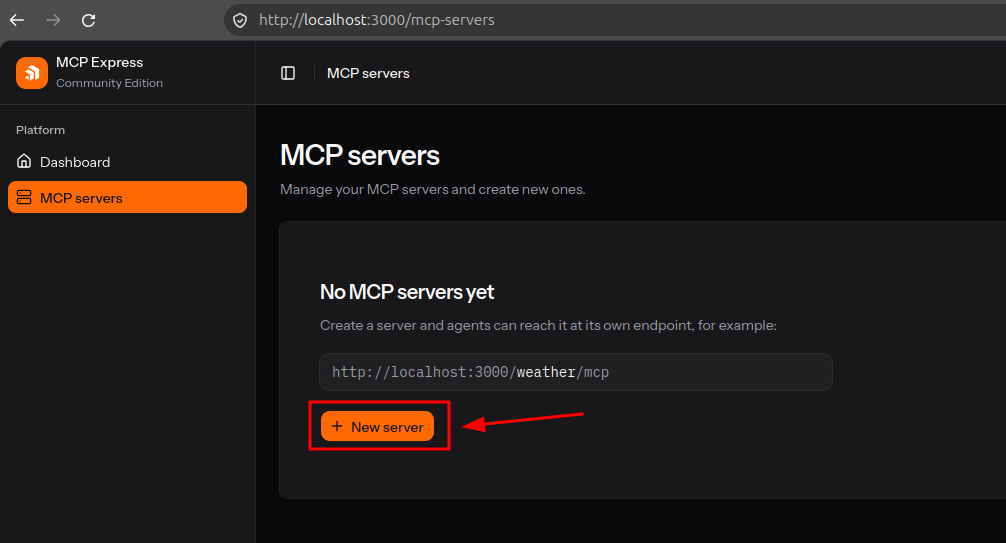
- Add a new server by pressing the “+ New Server” button. And fill out the necessary information.
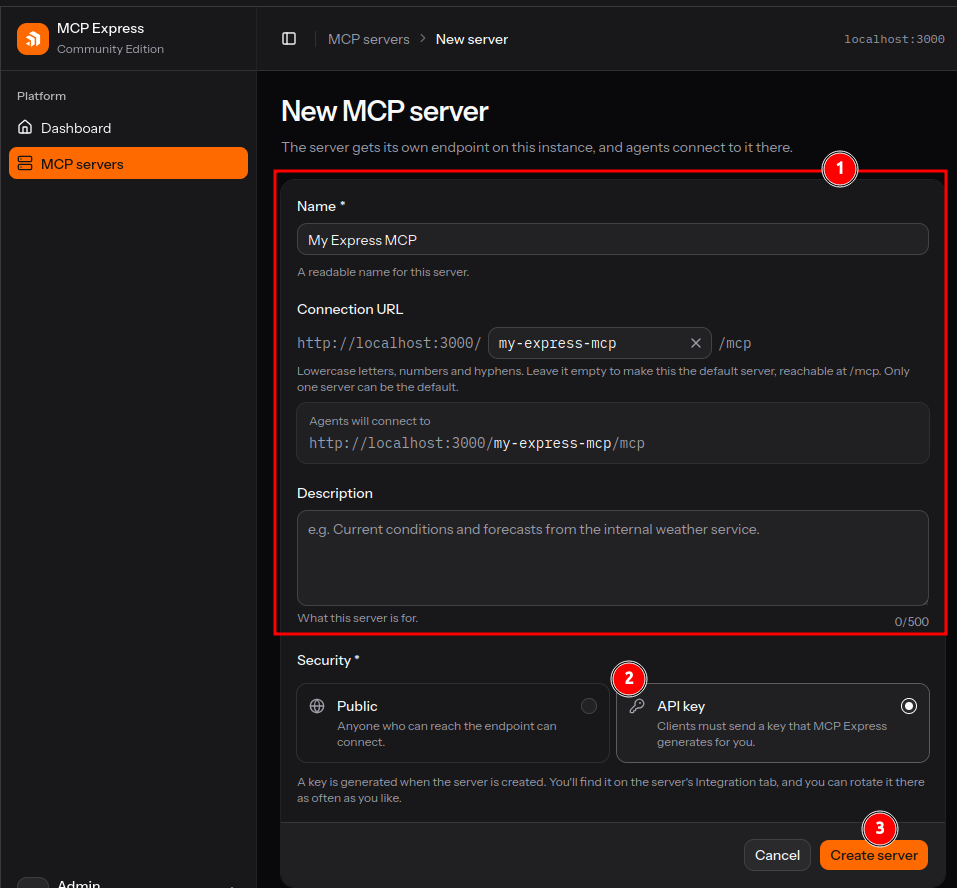
- Create the new Server by pressing the “Create Server” button.
- Package and Upload your code to Deploy.
Terminal window npm run package - Upload the created zip file
my-express-mcp.zipto theSource codeTab for your server.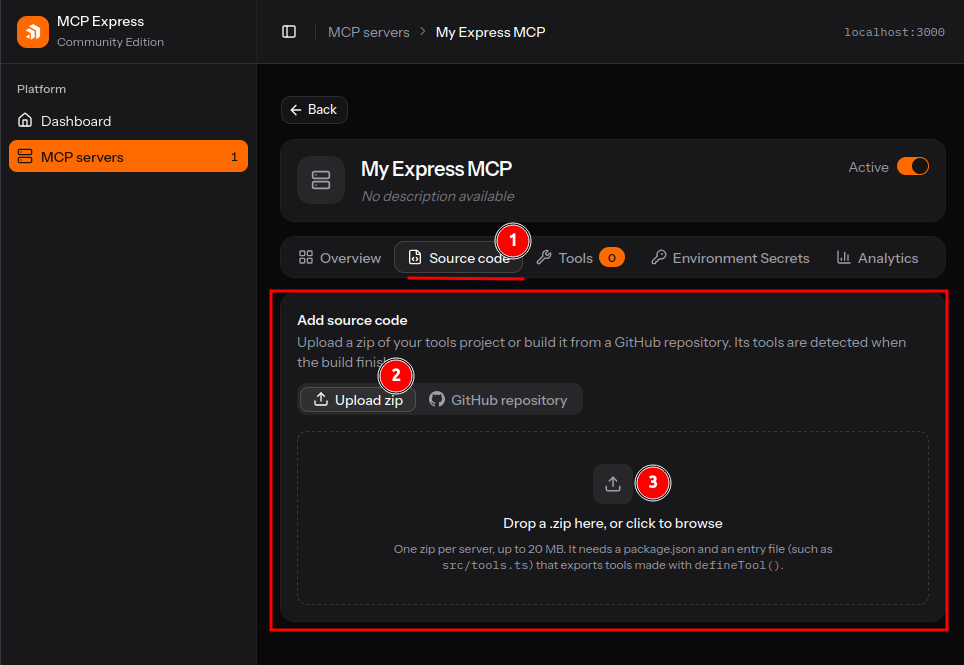
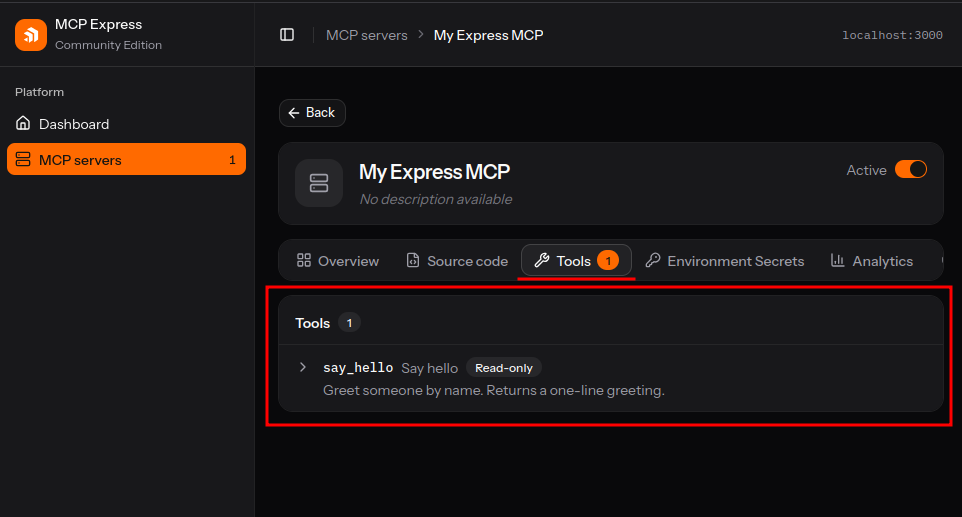
- Once the compilation is completed, the Tools are listed in the same section as seen below.